


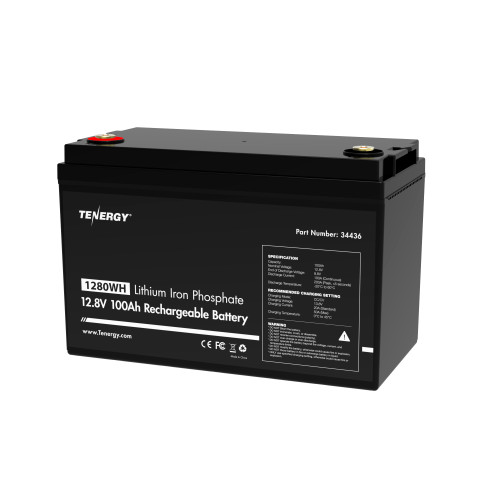
Tenergy LiFePO4 12.8V 100AH Deep Cycle Battery, Built-in 100A BMS, 4000+ Cycles, Ideal for RV, Solar, Off-Grid, and Power Storage
Sales Tax
Tenergy only collects sales tax on orders shipped to addresses in the States of California.
You may be responsible for state and local sales/use taxes when filing your tax returns. Please check your local sales tax laws.
-

Tenergy Premium AAA 1000mAh NiMH Rechargeable Battery
P/N 10405$1.99 (Inc. Tax)$1.99saved: $0xSales Tax
Tenergy only collects sales tax on orders shipped to addresses in the States of California.
You may be responsible for state and local sales/use taxes when filing your tax returns. Please check your local sales tax laws.
-
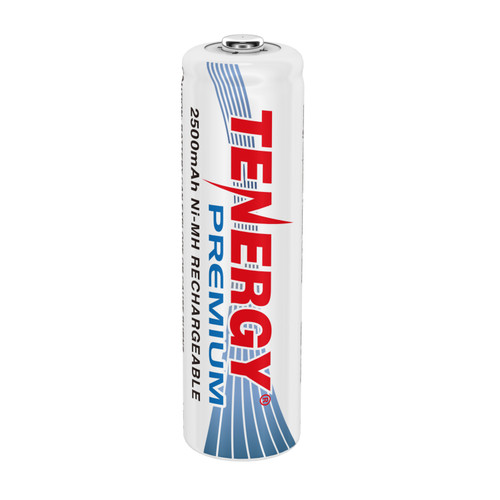
Tenergy Premium AA 2500mAh NiMH Rechargeable Battery
P/N 10320$2.49 (Inc. Tax)$2.49saved: $0xSales Tax
Tenergy only collects sales tax on orders shipped to addresses in the States of California.
You may be responsible for state and local sales/use taxes when filing your tax returns. Please check your local sales tax laws.
-
Tenergy Li-ion 14500 Cylindrical 3.6V 800mAh Flat Top Rechargeable Battery - UL Listed
P/N 30001$6.29 (Inc. Tax)$5.99(Ex. Tax)save $0.00
xSales Tax
Tenergy only collects sales tax on orders shipped to addresses in the States of California.
You may be responsible for state and local sales/use taxes when filing your tax returns. Please check your local sales tax laws.
-
Tenergy Plastic Box Holder for 4 AA Battery (Batteries sold separately)
P/N 80007$0.49 (Inc. Tax)$0.49saved: $0xSales Tax
Tenergy only collects sales tax on orders shipped to addresses in the States of California.
You may be responsible for state and local sales/use taxes when filing your tax returns. Please check your local sales tax laws.
-
Tenergy AA 2500mAh NiMH Rechargeable Battery
P/N 10342$1.99 (Inc. Tax)$1.99saved: $0xSales Tax
Tenergy only collects sales tax on orders shipped to addresses in the States of California.
You may be responsible for state and local sales/use taxes when filing your tax returns. Please check your local sales tax laws.
-
Tenergy 9V 250mAh NiMH Rechargeable Battery
P/N 10001$6.49 (Inc. Tax)$6.49saved: $0xSales Tax
Tenergy only collects sales tax on orders shipped to addresses in the States of California.
You may be responsible for state and local sales/use taxes when filing your tax returns. Please check your local sales tax laws.
-
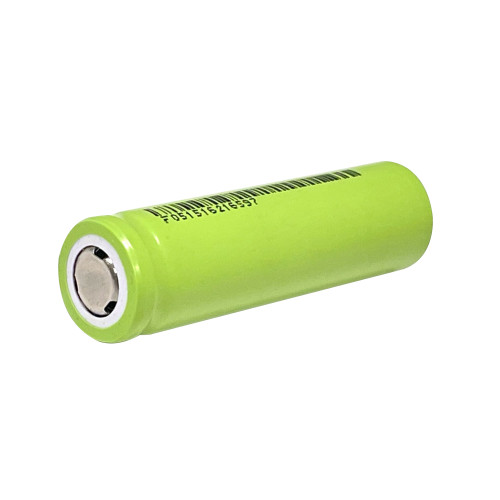
Tenergy Li-ion 18650 Cylindrical 3.7V 2600mAh Flat Top Rechargeable Battery-UL listed
P/N 30005$6.29 (Inc. Tax)$5.99(Ex. Tax)save $0.00
xSales Tax
Tenergy only collects sales tax on orders shipped to addresses in the States of California.
You may be responsible for state and local sales/use taxes when filing your tax returns. Please check your local sales tax laws.
-
LG INR18650 MJ1 3.635V 3500mAh Rechargeable Flat Top Battery, 10A Max. Discharge Current, W/O PCB
P/N 30708$17.84 $8.99 (Inc. Tax)$8.99save $7.999999999999998
Was $16.99
saved: $0xSales Tax
Tenergy only collects sales tax on orders shipped to addresses in the States of California.
You may be responsible for state and local sales/use taxes when filing your tax returns. Please check your local sales tax laws.
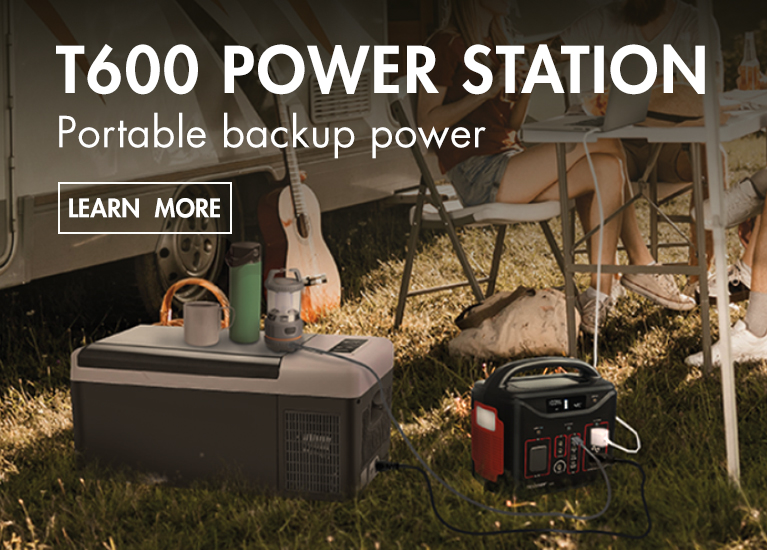
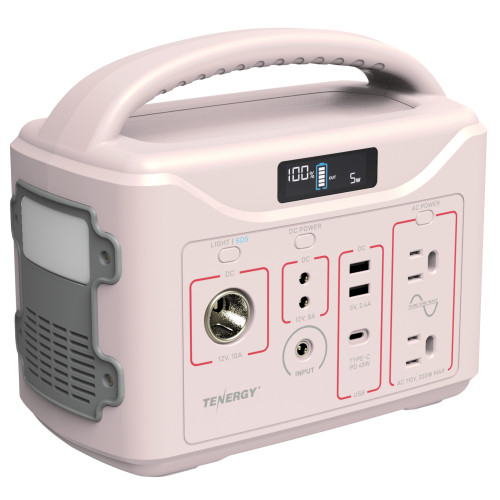
Tenergy T600 Portable Power Station, 600Wh Backup Lithium Battery with 500W AC outlets and 258W DC/USB including 100W PD USB-C output
P/N 59151
$499.99
(Inc. Tax)
$499.99
saved: $0
x
Sales Tax
Tenergy only collects sales tax on orders shipped to addresses in the States of California.
You may be responsible for state and local sales/use taxes when filing your tax returns. Please check your local sales tax laws.
Free Shipping
Tenergy Portable Power Station, 300Wh Battery, 110V/200W (Surge 400W) Two Pure Sine Wave AC outputs, USB type C PD 45W, Solar Ready Mobile Power for Outdoors Camping Vans RV Hunting Emergency Backup, Navy Blue
P/N 59148-01
$314.99
$249.99
(Inc. Tax)
$249.99
save $50
Was
$299.99
saved: $0
x
Sales Tax
Tenergy only collects sales tax on orders shipped to addresses in the States of California.
You may be responsible for state and local sales/use taxes when filing your tax returns. Please check your local sales tax laws.
Free Shipping
Tenergy T320 Portable Power Station, 300Wh Battery, 110V/200W (Surge 400W) Two Pure Sine Wave AC outputs, USB type C PD 45W, Solar Ready Mobile Power for Outdoors Camping Vans RV Hunting Emergency Backup, Beige
P/N 59148-02
$314.99
$249.99
(Inc. Tax)
$249.99
save $50
Was
$299.99
saved: $0
x
Sales Tax
Tenergy only collects sales tax on orders shipped to addresses in the States of California.
You may be responsible for state and local sales/use taxes when filing your tax returns. Please check your local sales tax laws.
Free Shipping
Tenergy T320 Portable Power Station, 300Wh Battery, 110V/200W (Surge 400W) Two Pure Sine Wave AC outputs, USB type C PD 45W, Solar Ready Mobile Power for Outdoors Camping Vans RV Hunting Emergency Backup
P/N 59148
$314.99
$249.99
(Inc. Tax)
$249.99
save $50
Was
$299.99
saved: $0
x
Sales Tax
Tenergy only collects sales tax on orders shipped to addresses in the States of California.
You may be responsible for state and local sales/use taxes when filing your tax returns. Please check your local sales tax laws.
Free Shipping
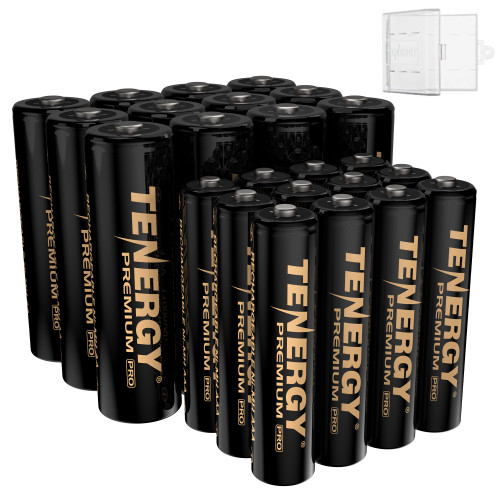
Tenergy Premium PRO Rechargeable AA and AAA Batteries Combo, High Capacity Low Self-Discharge 2800mah AA and 1100mAh NiMH AAA Battery, 24 Pack, 12 AA and 12 AAA
P/N 10455
$42.99
(Inc. Tax)
$42.99
saved: $0
x
Sales Tax
Tenergy only collects sales tax on orders shipped to addresses in the States of California.
You may be responsible for state and local sales/use taxes when filing your tax returns. Please check your local sales tax laws.
Free Shipping
Tenergy Premium PRO Rechargeable AA Batteries, High Capacity Low Self-Discharge 2800mAh NiMH AA Battery, 20 Pack
P/N 10446
$42.99
(Inc. Tax)
$42.99
saved: $0
x
Sales Tax
Tenergy only collects sales tax on orders shipped to addresses in the States of California.
You may be responsible for state and local sales/use taxes when filing your tax returns. Please check your local sales tax laws.
Free Shipping
Tenergy Premium High Capacity Rechargeable Battery (12-Pack and Charger) Arlo Certified Li-ion 3.7V 750mAh and Smart Fast Charger with LCD
P/N 96129
$104.99
$86.99
(Inc. Tax)
$86.99
save $13
Was
$99.99
saved: $0
x
Sales Tax
Tenergy only collects sales tax on orders shipped to addresses in the States of California.
You may be responsible for state and local sales/use taxes when filing your tax returns. Please check your local sales tax laws.
Free Shipping
Most Popular Products
<
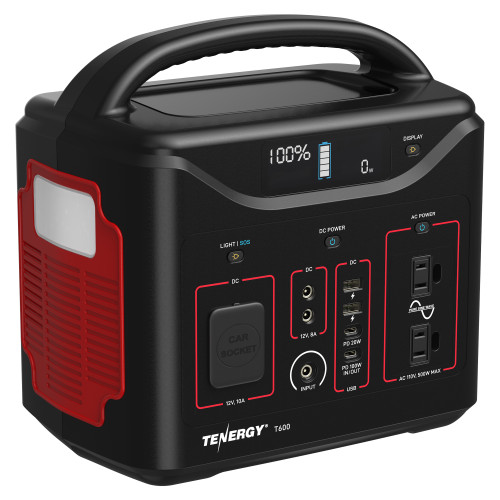
Tenergy T600 Portable Power Station, 600Wh Backup Lithium Battery with 500W AC outlets and 258W DC/USB including 100W PD USB-C output
Sales Tax
Tenergy only collects sales tax on orders shipped to addresses in the States of California.
You may be responsible for state and local sales/use taxes when filing your tax returns. Please check your local sales tax laws.
Tenergy Portable Power Station, 300Wh Battery, 110V/200W (Surge 400W) Two Pure Sine Wave AC outputs, USB type C PD 45W, Solar Ready Mobile Power for Outdoors Camping Vans RV Hunting Emergency Backup, Navy Blue
P/N 59148-01
$314.99
$249.99
(Inc. Tax)
$249.99
save $50
Was
$299.99
saved: $0
x
Sales Tax
Tenergy only collects sales tax on orders shipped to addresses in the States of California.
You may be responsible for state and local sales/use taxes when filing your tax returns. Please check your local sales tax laws.
Free Shipping
Tenergy T320 Portable Power Station, 300Wh Battery, 110V/200W (Surge 400W) Two Pure Sine Wave AC outputs, USB type C PD 45W, Solar Ready Mobile Power for Outdoors Camping Vans RV Hunting Emergency Backup, Beige
P/N 59148-02
$314.99
$249.99
(Inc. Tax)
$249.99
save $50
Was
$299.99
saved: $0
x
Sales Tax
Tenergy only collects sales tax on orders shipped to addresses in the States of California.
You may be responsible for state and local sales/use taxes when filing your tax returns. Please check your local sales tax laws.
Free Shipping
Tenergy T320 Portable Power Station, 300Wh Battery, 110V/200W (Surge 400W) Two Pure Sine Wave AC outputs, USB type C PD 45W, Solar Ready Mobile Power for Outdoors Camping Vans RV Hunting Emergency Backup
P/N 59148
$314.99
$249.99
(Inc. Tax)
$249.99
save $50
Was
$299.99
saved: $0
x
Sales Tax
Tenergy only collects sales tax on orders shipped to addresses in the States of California.
You may be responsible for state and local sales/use taxes when filing your tax returns. Please check your local sales tax laws.
Free Shipping
Tenergy Premium PRO Rechargeable AA and AAA Batteries Combo, High Capacity Low Self-Discharge 2800mah AA and 1100mAh NiMH AAA Battery, 24 Pack, 12 AA and 12 AAA
P/N 10455
$42.99
(Inc. Tax)
$42.99
saved: $0
x
Sales Tax
Tenergy only collects sales tax on orders shipped to addresses in the States of California.
You may be responsible for state and local sales/use taxes when filing your tax returns. Please check your local sales tax laws.
Free Shipping
Tenergy Premium PRO Rechargeable AA Batteries, High Capacity Low Self-Discharge 2800mAh NiMH AA Battery, 20 Pack
P/N 10446
$42.99
(Inc. Tax)
$42.99
saved: $0
x
Sales Tax
Tenergy only collects sales tax on orders shipped to addresses in the States of California.
You may be responsible for state and local sales/use taxes when filing your tax returns. Please check your local sales tax laws.
Free Shipping
Tenergy Premium High Capacity Rechargeable Battery (12-Pack and Charger) Arlo Certified Li-ion 3.7V 750mAh and Smart Fast Charger with LCD
P/N 96129
$104.99
$86.99
(Inc. Tax)
$86.99
save $13
Was
$99.99
saved: $0
x
Sales Tax
Tenergy only collects sales tax on orders shipped to addresses in the States of California.
You may be responsible for state and local sales/use taxes when filing your tax returns. Please check your local sales tax laws.
Free Shipping
Most Popular Products
<
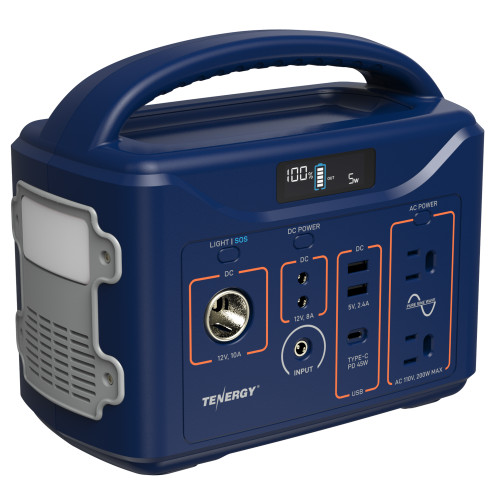
Tenergy Portable Power Station, 300Wh Battery, 110V/200W (Surge 400W) Two Pure Sine Wave AC outputs, USB type C PD 45W, Solar Ready Mobile Power for Outdoors Camping Vans RV Hunting Emergency Backup, Navy Blue
save $50
Was $299.99
Sales Tax
Tenergy only collects sales tax on orders shipped to addresses in the States of California.
You may be responsible for state and local sales/use taxes when filing your tax returns. Please check your local sales tax laws.
Tenergy T320 Portable Power Station, 300Wh Battery, 110V/200W (Surge 400W) Two Pure Sine Wave AC outputs, USB type C PD 45W, Solar Ready Mobile Power for Outdoors Camping Vans RV Hunting Emergency Backup, Beige
P/N 59148-02
$314.99
$249.99
(Inc. Tax)
$249.99
save $50
Was
$299.99
saved: $0
x
Sales Tax
Tenergy only collects sales tax on orders shipped to addresses in the States of California.
You may be responsible for state and local sales/use taxes when filing your tax returns. Please check your local sales tax laws.
Free Shipping
Tenergy T320 Portable Power Station, 300Wh Battery, 110V/200W (Surge 400W) Two Pure Sine Wave AC outputs, USB type C PD 45W, Solar Ready Mobile Power for Outdoors Camping Vans RV Hunting Emergency Backup
P/N 59148
$314.99
$249.99
(Inc. Tax)
$249.99
save $50
Was
$299.99
saved: $0
x
Sales Tax
Tenergy only collects sales tax on orders shipped to addresses in the States of California.
You may be responsible for state and local sales/use taxes when filing your tax returns. Please check your local sales tax laws.
Free Shipping
Tenergy Premium PRO Rechargeable AA and AAA Batteries Combo, High Capacity Low Self-Discharge 2800mah AA and 1100mAh NiMH AAA Battery, 24 Pack, 12 AA and 12 AAA
P/N 10455
$42.99
(Inc. Tax)
$42.99
saved: $0
x
Sales Tax
Tenergy only collects sales tax on orders shipped to addresses in the States of California.
You may be responsible for state and local sales/use taxes when filing your tax returns. Please check your local sales tax laws.
Free Shipping
Tenergy Premium PRO Rechargeable AA Batteries, High Capacity Low Self-Discharge 2800mAh NiMH AA Battery, 20 Pack
P/N 10446
$42.99
(Inc. Tax)
$42.99
saved: $0
x
Sales Tax
Tenergy only collects sales tax on orders shipped to addresses in the States of California.
You may be responsible for state and local sales/use taxes when filing your tax returns. Please check your local sales tax laws.
Free Shipping
Tenergy Premium High Capacity Rechargeable Battery (12-Pack and Charger) Arlo Certified Li-ion 3.7V 750mAh and Smart Fast Charger with LCD
P/N 96129
$104.99
$86.99
(Inc. Tax)
$86.99
save $13
Was
$99.99
saved: $0
x
Sales Tax
Tenergy only collects sales tax on orders shipped to addresses in the States of California.
You may be responsible for state and local sales/use taxes when filing your tax returns. Please check your local sales tax laws.
Free Shipping
Most Popular Products
<
Tenergy T320 Portable Power Station, 300Wh Battery, 110V/200W (Surge 400W) Two Pure Sine Wave AC outputs, USB type C PD 45W, Solar Ready Mobile Power for Outdoors Camping Vans RV Hunting Emergency Backup, Beige
save $50
Was $299.99
Sales Tax
Tenergy only collects sales tax on orders shipped to addresses in the States of California.
You may be responsible for state and local sales/use taxes when filing your tax returns. Please check your local sales tax laws.
Tenergy T320 Portable Power Station, 300Wh Battery, 110V/200W (Surge 400W) Two Pure Sine Wave AC outputs, USB type C PD 45W, Solar Ready Mobile Power for Outdoors Camping Vans RV Hunting Emergency Backup
P/N 59148
$314.99
$249.99
(Inc. Tax)
$249.99
save $50
Was
$299.99
saved: $0
x
Sales Tax
Tenergy only collects sales tax on orders shipped to addresses in the States of California.
You may be responsible for state and local sales/use taxes when filing your tax returns. Please check your local sales tax laws.
Free Shipping
Tenergy Premium PRO Rechargeable AA and AAA Batteries Combo, High Capacity Low Self-Discharge 2800mah AA and 1100mAh NiMH AAA Battery, 24 Pack, 12 AA and 12 AAA
P/N 10455
$42.99
(Inc. Tax)
$42.99
saved: $0
x
Sales Tax
Tenergy only collects sales tax on orders shipped to addresses in the States of California.
You may be responsible for state and local sales/use taxes when filing your tax returns. Please check your local sales tax laws.
Free Shipping
Tenergy Premium PRO Rechargeable AA Batteries, High Capacity Low Self-Discharge 2800mAh NiMH AA Battery, 20 Pack
P/N 10446
$42.99
(Inc. Tax)
$42.99
saved: $0
x
Sales Tax
Tenergy only collects sales tax on orders shipped to addresses in the States of California.
You may be responsible for state and local sales/use taxes when filing your tax returns. Please check your local sales tax laws.
Free Shipping
Tenergy Premium High Capacity Rechargeable Battery (12-Pack and Charger) Arlo Certified Li-ion 3.7V 750mAh and Smart Fast Charger with LCD
P/N 96129
$104.99
$86.99
(Inc. Tax)
$86.99
save $13
Was
$99.99
saved: $0
x
Sales Tax
Tenergy only collects sales tax on orders shipped to addresses in the States of California.
You may be responsible for state and local sales/use taxes when filing your tax returns. Please check your local sales tax laws.
Free Shipping
Most Popular Products
<

Tenergy T320 Portable Power Station, 300Wh Battery, 110V/200W (Surge 400W) Two Pure Sine Wave AC outputs, USB type C PD 45W, Solar Ready Mobile Power for Outdoors Camping Vans RV Hunting Emergency Backup
save $50
Was $299.99
Sales Tax
Tenergy only collects sales tax on orders shipped to addresses in the States of California.
You may be responsible for state and local sales/use taxes when filing your tax returns. Please check your local sales tax laws.
Tenergy Premium PRO Rechargeable AA and AAA Batteries Combo, High Capacity Low Self-Discharge 2800mah AA and 1100mAh NiMH AAA Battery, 24 Pack, 12 AA and 12 AAA
P/N 10455
$42.99
(Inc. Tax)
$42.99
saved: $0
x
Sales Tax
Tenergy only collects sales tax on orders shipped to addresses in the States of California.
You may be responsible for state and local sales/use taxes when filing your tax returns. Please check your local sales tax laws.
Free Shipping
Tenergy Premium PRO Rechargeable AA Batteries, High Capacity Low Self-Discharge 2800mAh NiMH AA Battery, 20 Pack
P/N 10446
$42.99
(Inc. Tax)
$42.99
saved: $0
x
Sales Tax
Tenergy only collects sales tax on orders shipped to addresses in the States of California.
You may be responsible for state and local sales/use taxes when filing your tax returns. Please check your local sales tax laws.
Free Shipping
Tenergy Premium High Capacity Rechargeable Battery (12-Pack and Charger) Arlo Certified Li-ion 3.7V 750mAh and Smart Fast Charger with LCD
P/N 96129
$104.99
$86.99
(Inc. Tax)
$86.99
save $13
Was
$99.99
saved: $0
x
Sales Tax
Tenergy only collects sales tax on orders shipped to addresses in the States of California.
You may be responsible for state and local sales/use taxes when filing your tax returns. Please check your local sales tax laws.
Free Shipping
Most Popular Products
<
Tenergy Premium PRO Rechargeable AA and AAA Batteries Combo, High Capacity Low Self-Discharge 2800mah AA and 1100mAh NiMH AAA Battery, 24 Pack, 12 AA and 12 AAA
Sales Tax
Tenergy only collects sales tax on orders shipped to addresses in the States of California.
You may be responsible for state and local sales/use taxes when filing your tax returns. Please check your local sales tax laws.
Tenergy Premium PRO Rechargeable AA Batteries, High Capacity Low Self-Discharge 2800mAh NiMH AA Battery, 20 Pack
P/N 10446
$42.99
(Inc. Tax)
$42.99
saved: $0
x
Sales Tax
Tenergy only collects sales tax on orders shipped to addresses in the States of California.
You may be responsible for state and local sales/use taxes when filing your tax returns. Please check your local sales tax laws.
Free Shipping
Tenergy Premium High Capacity Rechargeable Battery (12-Pack and Charger) Arlo Certified Li-ion 3.7V 750mAh and Smart Fast Charger with LCD
P/N 96129
$104.99
$86.99
(Inc. Tax)
$86.99
save $13
Was
$99.99
saved: $0
x
Sales Tax
Tenergy only collects sales tax on orders shipped to addresses in the States of California.
You may be responsible for state and local sales/use taxes when filing your tax returns. Please check your local sales tax laws.
Free Shipping
Most Popular Products
<

Tenergy Premium PRO Rechargeable AA Batteries, High Capacity Low Self-Discharge 2800mAh NiMH AA Battery, 20 Pack
Sales Tax
Tenergy only collects sales tax on orders shipped to addresses in the States of California.
You may be responsible for state and local sales/use taxes when filing your tax returns. Please check your local sales tax laws.
Tenergy Premium High Capacity Rechargeable Battery (12-Pack and Charger) Arlo Certified Li-ion 3.7V 750mAh and Smart Fast Charger with LCD
P/N 96129
$104.99
$86.99
(Inc. Tax)
$86.99
save $13
Was
$99.99
saved: $0
x
Sales Tax
Tenergy only collects sales tax on orders shipped to addresses in the States of California.
You may be responsible for state and local sales/use taxes when filing your tax returns. Please check your local sales tax laws.
Free Shipping
Most Popular Products
<
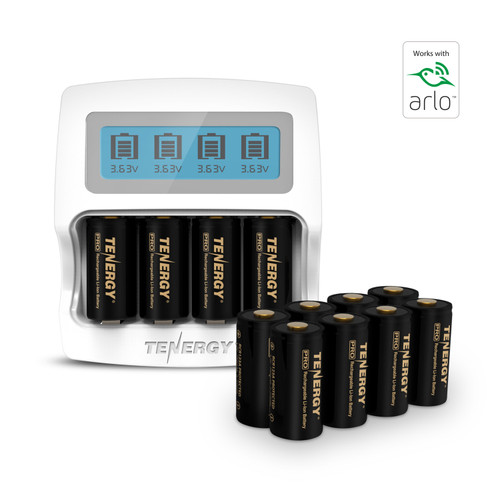
Tenergy Premium High Capacity Rechargeable Battery (12-Pack and Charger) Arlo Certified Li-ion 3.7V 750mAh and Smart Fast Charger with LCD
save $13
Was $99.99
Sales Tax
Tenergy only collects sales tax on orders shipped to addresses in the States of California.
You may be responsible for state and local sales/use taxes when filing your tax returns. Please check your local sales tax laws.